
Desserts
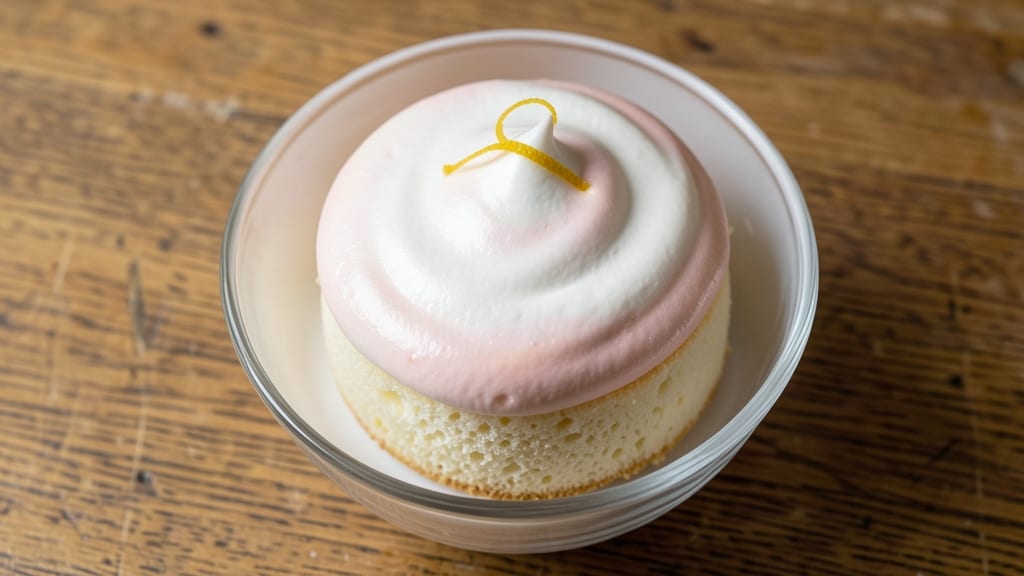
This aquafaba sponge cake recipe proves that plant-based baking doesn't mean sacrificing lightness or structure. The secret lies in carefully whipped chickpea brine, which mimics egg whites' ability to create stable, airy peaks—no eggs required.
I've perfected this technique after years of testing, ensuring your cake rises properly, stays moist, and holds its shape without collapsing.
The key to success is patience—whipping the aquafaba to stiff peaks (not dry) and folding it gently into the batter to maintain air pockets. A water bath ensures even baking, while precise timing prevents overbaking.
What you'll end up with is a tender, golden sponge with a delicate crumb that's impossible to distinguish from traditional cakes—unless you peek at the ingredients.
This recipe delivers restaurant-quality results without dairy or eggs, making it perfect for vegan diets, egg allergies, or anyone craving a lighter dessert. The cake's neutral flavor also makes it an excellent canvas for fruit compotes, chocolate ganache, or dusted powdered sugar.
Every bite is proof that plant-based baking can be just as impressive as traditional methods.
Whether you're baking for a celebration or simply craving a classic sponge, this method transforms a humble pantry staple into something extraordinary. The technique is straightforward, but the results will impress even the most skeptical dessert lovers. Let's get baking!
Ingredients for aquafaba sponge cake
These precision ingredients transform humble chickpea brine into a restaurant-worthy vegan sponge.
| Ingredient | Amount | Notes |
|---|---|---|
| Aquafaba (Chickpea Brine) 🥜 | 1 cup | Freshly opened, unsalted preferred |
| Granulated Sugar 🍚 | 1 ½ cups | Superfine for best texture |
| All-Purpose Flour 🌾 | 1 ½ cups | Sifted for lightness |
| Cream of Tartar 🧂 | ¼ tsp | Stabilizes whipped aquafaba |
| Baking Powder 🍞 | 1 ½ tsp | Aluminum-free preferred |
| Vanilla Extract 🌿 | 1 tsp | Pure, high-quality extract |
| Vegetable Oil 🫒 | ¼ cup | Light, neutral flavor |
| Unflavored Almond Milk 🥛 | ½ cup | For moisture balance |
| Salt 🧂 | ¼ tsp | Fine sea salt preferred |
| Lemon Juice 🍋 | 1 tbsp | Freshly squeezed |
| Powdered Sugar 🍚 | ½ cup | For dusting (optional) |
The aquafaba is non-negotiable—freshly opened, unsalted brine from canned chickpeas works best. Trader Joe's and Whole Foods carry high-quality canned chickpeas with minimal additives. If using salted brine, rinse thoroughly to avoid over-salting. The cream of tartar is crucial for stabilizing the whipped aquafaba; Bob's Red Mill sells it in small quantities if you don't already have it. For the flour, King Arthur or Gold Medal brands are ideal—they sift beautifully and create a tender crumb. Store aquafaba in the fridge for up to 3 days after opening.
No cream of tartar? White vinegar or lemon juice at half the amount works in a pinch, though the aquafaba won't whip as stably. Substituting almond milk? Oat milk or soy milk both work, but they may alter the cake's moisture slightly. The vanilla extract should be pure—Nielsen-Massey or McCormick are reliable brands. For the sugar, superfine is ideal, but if you only have granulated, pulse it in a food processor for 10-15 seconds to achieve a similar texture. The lemon juice adds brightness and helps balance the sweetness—freshly squeezed is a must.
This batter must be used immediately after folding to preserve air pockets. For best results, bake within 30 minutes of mixing. The cake keeps well in an airtight container at room temperature for 2 days or in the fridge for 5 days. For longer storage, wrap tightly in plastic and freeze for up to 3 months. Reheat slices in a 200°F oven for 5 minutes to restore freshness. The powdered sugar dusting is optional but adds a professional finish—use it if serving immediately.
Why You'll Love This Recipe
- No Eggs, No Problem: I keep a can of chickpeas in my pantry just for this—aquafaba whips into fluffy meringue faster than you can say "baking powder." The cream of tartar stabilizes it like magic, so it holds its shape without collapsing. (Yes, even if I open the oven door mid-bake.)
- Light Yet Rich: That sugar and aquafaba combo creates a cake so tender it practically melts in your mouth, but with just enough structure to slice cleanly. Honestly, it’s the closest I’ve gotten to classic sponge cake without eggs—moist but never heavy.
- Budget Baking: Flour, sugar, and a can of chickpeas? This recipe costs me pennies compared to buying pre-made cakes. I’ve used leftovers for breakfast toast, dessert, or even packed it in lunches—no one ever guesses it’s vegan.
- One-Bowl Wonder: Mix, fold, bake. That’s it. No separate egg whites to whisk, no messy cleanup. The baking powder does all the work while I’m still scraping the bowl. (My lazy Sundays thank me.)
Step-by-step instructions for aquafaba sponge cake
Mastering this egg-free sponge requires precision—here's how to achieve light, stable layers.
Whip Aquafaba to Stiff Peaks
Pour the 1 cup Aquafaba (Chickpea Brine) into a clean, grease-free metal bowl. Add the 0.25 tsp Cream of Tartar and whisk vigorously by hand for 30 seconds to dissolve completely. This acidity is crucial—it stabilizes the foam and prevents collapse.
Transfer the mixture to a stand mixer fitted with the whisk attachment. Begin beating on medium-high speed until soft peaks form. Increase to high speed and continue whipping for 6-8 minutes until the aquafaba forms stiff, glossy peaks that hold their shape when lifted. The mixture should nearly triple in volume and become thick enough to leave a trail when the whisk is lifted. Be patient—rushing this step leads to dense cake layers.
Gradually Incorporate Sugar and Wet Ingredients
With the mixer running on low speed, gradually add the 1.5 cups Granulated Sugar in a slow, steady stream. This prevents graininess and ensures even distribution. After all sugar is incorporated, reduce speed to low and add the 0.25 cup Vegetable Oil, 0.5 cup Unflavored Almond Milk, 1 tsp Vanilla Extract, 1 tbsp Lemon Juice, and 0.25 tsp Salt. Mix just until fully combined—overmixing develops gluten and makes the cake tough.
Here's the thing—stop mixing as soon as the batter looks smooth. You should still see some flour streaks, and the batter should be thick but pourable. The lemon juice brightens the flavor while the almond milk adds moisture without altering the delicate structure. This stage is where most beginners go wrong by overmixing, so resist the urge to blend until perfectly smooth.
Fold in Dry Ingredients Gently
In a separate bowl, sift together the 1.5 cups All-Purpose Flour and 1.5 tsp Baking Powder. This aeration is key—it prevents dense pockets in the cake. Using a rubber spatula, gently fold the dry ingredients into the wet mixture in three additions, mixing just until no dry spots remain. Be careful not to deflate the whipped aquafaba—fold from the bottom and cut through the center to incorporate fully while maintaining air pockets.
The batter should be thick but still flow slowly when the bowl is tilted. If it's too stiff, add 1 tablespoon of almond milk to loosen slightly. This is your final chance to adjust consistency before baking. The goal is a batter that holds its shape when spooned but still allows even distribution in the pan.
Bake in Two Layers at Precise Temperature
Preheat your oven to 350°F and grease two 8-inch round cake pans with vegetable oil, then line the bottoms with parchment paper. Divide the batter evenly between the pans, spreading it into the corners to ensure even thickness. Tap the pans gently on the counter to remove any air bubbles.
Bake for 25-30 minutes until the edges are golden brown and a toothpick inserted in the center comes out clean. The cake should spring back slightly when pressed gently in the center. Rotate the pans halfway through baking for even browning. The oven thermometer is your friend here—many home ovens run hot, so start checking at the 20-minute mark if your oven tends to overbake.
Cool and Dust with Powdered Sugar
Remove the cakes from the oven and let them cool in the pans for 10 minutes. Then transfer to a wire rack to cool completely. This gradual cooling prevents cracking. Once fully cooled, dust the tops generously with 0.5 cup Powdered Sugar using a fine-mesh sieve for an elegant finish.
The cake should have a tender crumb with a slightly domed top—this indicates proper leavening. If the top is flat, your oven may need calibration. For serving, slice with a serrated knife dipped in hot water for clean cuts. This sponge holds its shape beautifully when sliced, making it perfect for layering with fillings or enjoying as-is.
Pro Tips For Making Aquafaba Sponge Cake
- Whisk Aquafaba Cold: I learned this the hard way—warm chickpea brine loses its ability to hold air properly. Grab that can of chickpeas straight from the fridge, drain the brine into a bowl, and whisk it before it has a chance to warm up. Cold aquafaba whips up faster and stiffer, which means a lighter sponge.
- Sift the Dry Mix: Skipping this step is how you end up with a cake that’s dense as a brick. Sift the flour, baking powder, and cream of tartar together—twice—to break up clumps and distribute the leavening evenly. Yes, it’s extra effort, but your cake will rise higher and stay fluffier longer.
- Don’t Overmix the Batter: The moment you see the batter turn pale and slightly thicken, stop. Overmixing develops the gluten in the flour, and that’s how you get a tough, chewy sponge instead of a tender one. Fold just until no dry streaks remain—about 10-12 strokes max.
- Preheat Pan and Oven: A cold pan steals heat from your cake, causing the edges to set before the center bakes. Preheat your pan (or line it with parchment) in the oven for 5 minutes—just long enough to warm it up. Your cake will rise evenly and won’t stick like glue. (Trust me, I’ve tried both ways.)
Essential equipment for great aquafaba sponge cake
Stand Mixer Essentials
Your stand mixer is the MVP for this recipe—I use my KitchenAid Artisan Series with the whisk attachment. The whisk must be in good condition; any grease or residue will prevent stiff peaks.
For budget-friendly options, the Cuisinart SM-50 works perfectly. Always use a metal bowl—glass or plastic can't handle the heat generated during whipping. 💡
Baking Pans
Invest in two high-quality 8-inch round cake pans with removable bottoms—I recommend Wilton Premium Non-Stick or USA Pan. These pans distribute heat evenly and release cakes effortlessly. Grease them thoroughly with vegetable oil and line the bottoms with parchment paper to prevent sticking.
If you only have one pan, bake one layer at a time and double the recipe for a single-layer cake.
Measuring Tools
Precision matters in baking, so use a digital kitchen scale for the aquafaba and flour—OXO Good Grips is my go-to. For liquid ingredients, a clear glass measuring cup with markings is essential.
The cream of tartar and baking powder should be measured with a 1/4 teaspoon measuring spoon—never eyeball these! A fine-mesh sieve is also critical for dusting powdered sugar evenly. ✨
Water Bath Setup
For extra insurance against cracking, bake your cakes in a water bath. Place your cake pans in a larger roasting pan, then add 1 inch of hot water to the bottom. This creates a humid environment that prevents the outer edges from drying too quickly.
I use a Le Creuset Stoneware Roasting Pan, but any oven-safe pan works. Just ensure the water doesn't touch the pans.
Cooling Accessories
After baking, transfer your cakes to a wire cooling rack—I love the OXO Good Grips Collapsible for its space-saving design. A spatula with a flexible edge helps remove cakes from pans without tearing.
For dusting powdered sugar, a fine-mesh sieve (like the Norpro Stainless Steel) ensures an even, professional finish. Keep these tools handy to avoid rushing the cooling process, which can cause cracks. 💫
Nutrition facts
Frequently asked questions
Can I substitute aquafaba with another egg replacer?
While aquafaba is ideal for this recipe, you can try 1/4 cup ground flaxseed mixed with 3/4 cup water per egg, but results won't be as light. For a closer texture, use 1/4 cup applesauce or 1/4 cup mashed banana per egg, though these add moisture and may slightly alter flavor. The whipped stability of aquafaba is unmatched for sponge cakes—these substitutes work better in denser baked goods.
Why did my aquafaba not whip to stiff peaks?
This usually happens if the bowl has grease residue, the aquafaba is old (older than 3 days), or you didn't add cream of tartar. Always use a clean, grease-free metal bowl and freshly opened brine. If it's still not working, try adding 1/8 tsp xanthan gum to stabilize the foam. Also ensure your whisk attachment is in good condition—dull whisk blades prevent proper aeration.
How do I make this recipe gluten-free?
Replace the all-purpose flour with a 1:1 gluten-free baking flour blend like Bob's Red Mill or King Arthur. Add 1/2 tsp xanthan gum to the dry ingredients to improve structure. Sift the blend thoroughly and fold it into the wet mixture gently to maintain air pockets. The cake will still be tender but may be slightly denser than the original version.
Can I bake this cake in a single layer?
Yes! Simply double the recipe and bake in one 9-inch round pan or 9x13-inch baking dish. Increase baking time by 5-10 minutes and check for doneness at 25 minutes. For a baking dish, reduce oven temperature to 325°F to prevent overbrowning. The single-layer version works perfectly for trifles or as a base for fruit toppings.
What's the best way to store leftover cake?
Wrap the cake tightly in plastic wrap and store at room temperature for up to 2 days. For longer storage, refrigerate for 5 days or freeze for 3 months. To serve, let it sit at room temperature for 30 minutes before slicing. For reheating, wrap a slice in a damp paper towel and microwave for 10-15 seconds to restore freshness.