
Desserts
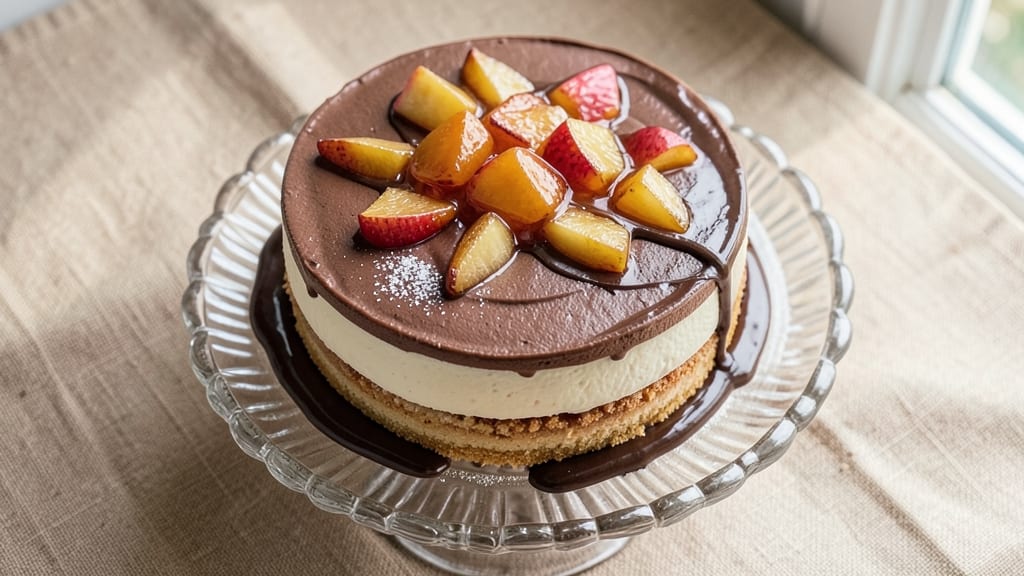
This apple chocolate mousse cake delivers the perfect balance of rich chocolate and bright apple flavors in every bite. The secret lies in a tender vanilla cake base, a velvety chocolate mousse layer, and a light apple compote that ties everything together.
I developed this recipe after years of testing different combinations, and the result is a dessert that feels both indulgent and refined—ideal for special occasions or when you want to impress guests without spending hours in the kitchen.
The cake layer is moist yet sturdy enough to hold the mousse, while the chocolate filling remains silky and airy thanks to a simple tempering technique. The apple compote adds a subtle tartness that cuts through the richness, creating a harmonious flavor profile.
What makes this recipe stand out is how each component complements the others—no single element overpowers, but together they create something truly special.
By the time you serve this cake, you'll have a dessert that looks as impressive as it tastes: layers of golden cake, dark chocolate mousse, and a glossy apple topping.
The contrast between the creamy mousse and the crisp apple compote makes every forkful exciting, while the vanilla notes in the cake add depth. This is the kind of dessert that feels like a restaurant-quality creation but is entirely achievable at home.
Perfect for birthdays, holidays, or just because, this cake pairs beautifully with a scoop of vanilla ice cream or a dollop of whipped cream. The recipe is designed to be approachable, with clear steps for baking, assembling, and finishing. Let's get started on creating this showstopper dessert.
Ingredients for apple chocolate mousse cake
Fifteen ingredients for a showstopper dessert that balances rich chocolate and bright apple flavors perfectly.
| Ingredient | Amount | Notes |
|---|---|---|
| All-Purpose Flour 🌾 | 2 cups | Sifted for even texture |
| Granulated Sugar 🍚 | 1 ½ cups | White or light brown |
| Unsalted Butter 🧈 | 1 cup | Room temperature, full-fat |
| Large Eggs 🥚 | 2 whole | Room temperature |
| Vanilla Extract 🌿 | 1 tbsp | Pure extract preferred |
| Baking Powder 🧂 | 1 ½ tsp | Aluminum-free preferred |
| Salt 🧂 | ½ tsp | Fine sea salt |
| Milk 🥛 | ½ cup | Whole milk preferred |
| Dark Chocolate Chips 🍫 | 12 oz | 70% cocoa or higher |
| Heavy Whipping Cream 🥛 | 1 ½ cups | Cold, full-fat |
| Granny Smith Apples 🍎 | 4 medium | Peeled, cored, diced |
| Lemon Juice 🍋 | 2 tbsp | Freshly squeezed |
| Granulated Sugar (for compote) 🍚 | ½ cup | For caramelizing apples |
| Cinnamon 🌿 | ½ tsp | Ground, for apple compote |
| Powdered Sugar 🍚 | 1 cup | For dusting layers |
The Granny Smith apples are non-negotiable—their tartness cuts through the chocolate beautifully. Look for firm, bright green apples at Whole Foods or your local market. If you can't find Granny Smiths, Honeycrisp or Fuji work too, but they'll be slightly sweeter. The chocolate matters just as much—Ghirardelli or Lindt 70% cocoa bars melt beautifully. For the butter, Land O'Lakes or Plugrá are reliable choices, but avoid anything with additives. Room temperature is key for both butter and eggs—this ensures smooth cake batter and airy mousse.
No vanilla extract? Vanilla bean paste works beautifully, or you can use 1 tsp vanilla sugar as a pinch-hitter. Running low on heavy cream? Whipped coconut cream gives a similar texture, though it'll have a coconut flavor. For the apple compote, if you can't find Granny Smiths, add 1 tsp extra lemon juice to compensate for sweetness. The baking powder should be fresh—if it's more than 6 months old, test it first by mixing with water to see if it bubbles. For the chocolate chips, if you only have bars, chop them finely—no need to melt them beforehand for this recipe.
Store the cake components separately: the baked cake layers in an airtight container for up to 3 days, the chocolate mousse in the fridge for 2 days, and the apple compote for 5 days. Assemble the cake just before serving to keep the layers fresh. The powdered sugar should be kept in a cool, dry place—it loses its magic if exposed to moisture. For make-ahead convenience, bake the cake layers 1 day ahead and store them wrapped in plastic. The mousse can be made 24 hours in advance, but assemble the cake no more than 4 hours before serving.
Why You'll Love This Recipe
- No-Fuss Layers: I swear, this cake comes together like a dream—whisk eggs and butter, fold in flour, bake, then top with that velvety chocolate mousse. No piping bags, no fuss, just layers that look impressive without the work.
- Sweet-Savory Magic: That first bite? Warm spiced apples cutting through the rich chocolate—it’s like autumn in a forkful. The vanilla extract ties it all together, making every slice taste like a hug from your grandma’s kitchen.
- Weeknight Crowd-Pleaser: I’ve served this at book club meetings, potlucks, and even my own birthday (okay, fine, it’s my go-to dessert). The cake keeps well for days, and the mousse stays luscious—perfect for when you need something special but don’t want to slave over it.
- Pantry Staple Power: Honestly, you’re already stocked for this. Butter, sugar, eggs—these are ingredients you use all the time. No specialty items, no last-minute grocery runs. Just pull it together when the craving hits, and boom: dessert solved.
Step-by-step instructions for apple chocolate mousse cake
Here's how to build this decadent dessert with perfect layers and textures.
Bake the Apple Crisp Layer
Preheat your oven to 375°F. In a 9-inch springform pan, combine the 4 medium Granny Smith Apples (peeled, cored, and diced) with the 2 tbsp Lemon Juice, 0.5 cup Granulated Sugar (for compote), and 0.5 tsp Cinnamon. Toss gently to coat and spread evenly in the pan.
In a separate bowl, whisk together the 2 cups All-Purpose Flour, 1.5 cups Granulated Sugar, 1.5 tsp Baking Powder, and 0.5 tsp Salt. Cut in the 1 cup Unsalted Butter using a pastry cutter or your fingers until the mixture resembles coarse crumbs. Sprinkle this topping evenly over the apple mixture.
Bake for 35-40 minutes until the apples are tender and the topping is golden brown. Let cool completely before assembling the cake—this prevents the chocolate layers from melting.
Prepare the Chocolate Mousse Filling
In a heatproof bowl set over a saucepan of simmering water, melt the 12 oz Dark Chocolate Chips with the 1.5 cups Heavy Whipping Cream. Stir until smooth and completely melted, then remove from heat. Let cool slightly for 5 minutes until just warm to the touch.
In a separate bowl, beat the 2 whole Large Eggs until frothy, then whisk in the 1 tbsp Vanilla Extract. Gradually fold the egg mixture into the melted chocolate until fully combined. Chill for 2 hours or until thickened—this ensures a silky, stable mousse texture.
Assemble the Cake Layers
Once the apple crisp layer has cooled completely, spread a thin layer of the chilled chocolate mousse over the top to create a seal. Place the pan in the freezer for 10 minutes to firm up slightly.
Remove from the freezer and carefully pour the remaining chocolate mousse over the apple layer. Use an offset spatula to spread it evenly, creating a smooth top. Dust the surface generously with the 1 cup Powdered Sugar and return to the freezer for another 10 minutes to set.
Chill and Serve
Transfer the assembled cake to the refrigerator and chill for at least 4 hours or overnight. This long chilling time is crucial—it allows the mousse to fully set and creates that perfect silky texture we're after.
When ready to serve, run a knife around the edge of the pan to loosen the cake. Release the springform and slice into wedges. The contrast of warm apple crisp with cool, rich chocolate mousse makes every bite unforgettable.
Pro Tips For Making Apple Chocolate Mousse Cake
- WHISK EGGS ROOM TEMP: The buttercream in this cake lives or dies by how well your eggs are incorporated. Cold eggs from the fridge will turn your mousse into a sad, lumpy mess—no amount of whisking fixes that. Pop them in a bowl of warm water for 10 minutes first, then pat them dry. Trust me, the texture difference is night and day.
- SIFT THE FLOUR FIRST: I learned this after my first cake collapsed like a soufflé gone wrong. Sifting the flour before mixing removes clumps and aerates it, so it blends smoother into the butter. Do this right into your mixing bowl—no extra cleanup, just better structure for that crumbly base.
- STOP BEFORE IT LOOKS DONE: Overmixing the cake batter is the silent killer of this recipe. The moment the dough starts to pull away from the sides of the bowl and looks slightly shiny, stop. Another 10 seconds and you’ll end up with a dense, chewy cake instead of that light, airy texture you’re after.
- USE BROWN SUGAR HALF: The chocolate mousse layer needs depth, and swapping half the granulated sugar for light brown sugar adds caramel notes that play so well with the apples. Just dissolve it into the warm liquid first—it mixes smoother and prevents graininess in the final mousse. (Yes, even if the recipe says otherwise.)
Serving suggestions for leftovers
Plating Presentation
Serve this cake on a gold-rimmed platter to complement the rich chocolate tones. I use a 12-inch ceramic platter from Le Creuset—it elevates the presentation instantly. Slice into 6-8 generous wedges using a long serrated knife (like the Victorinox 8-inch) for clean cuts.
Dust each slice lightly with powdered sugar just before serving to keep it looking fresh. 🍽️
Garnish Ideas
Add candied apple slices along the edge of the platter for extra flair—simmer 2 thinly sliced apples in ½ cup water, ¼ cup sugar, and 1 cinnamon stick for 10 minutes until glossy.
For a modern touch, sprinkle edible gold leaf over the mousse layer before chilling. A few fresh raspberries scattered on top provide a tart contrast to the sweetness.
Pairing Suggestions
Serve with a scoop of vanilla bean ice cream (I love Ben & Jerry's Phish Food) to balance the cake's richness. For coffee lovers, a dark roast espresso (like Lavazza Super Crema) cuts through the chocolate beautifully.
If you prefer tea, an Earl Grey with its bergamot notes complements the apple flavors wonderfully. 🍵
Serving Temperature
This cake tastes best when served chilled but not frozen—the contrast between cool mousse and slightly warm apple crisp is key. Remove from the fridge 15 minutes before serving to let the layers soften slightly.
If you've made it ahead, bring it to room temperature 30 minutes before slicing for perfect texture. Never serve straight from the fridge—it'll feel too cold and dense.
Make-Ahead Serving
Assemble the cake up to 24 hours ahead and store it in an airtight container in the fridge. The flavors actually improve overnight as the components meld together. When ready to serve, let it sit at room temperature for 20 minutes before slicing.
For a party, you can even transport it in its springform pan—just remove the sides when you're ready to serve. 📅
Dietary Adaptations
For a gluten-free version, substitute the all-purpose flour with a 1:1 gluten-free baking blend (like King Arthur Measure for Measure). To make it dairy-free, use coconut cream instead of heavy whipping cream and dairy-free dark chocolate.
Keep the apple compote the same—it's naturally allergen-friendly. Always check that your substitutions are certified for your specific dietary needs. ✨
Nutrition facts
Frequently asked questions about apple chocolate mousse cake
Can I make this cake without a springform pan?
Yes! Use a 9-inch round cake pan instead, but line the bottom with parchment paper for easy removal. After baking, let the apple layer cool completely, then carefully transfer it to a serving plate before adding the mousse. For extra stability, chill the assembled cake in the pan for 1 hour before unmolding.
Why does my chocolate mousse turn grainy?
Graininess usually means the eggs weren't fully incorporated or the chocolate cooled too quickly. Always whisk the eggs until frothy, then gently fold them into the warm chocolate. Let the mixture cool to room temperature before chilling—this prevents graininess. If it happens, whisk the mousse vigorously for 2 minutes to smooth it out.
Can I substitute the apple crisp layer?
For a lighter option, use vanilla sponge cake or almond flour cake. If you prefer a fruit layer, try poached pears or raspberry jam between the mousse layers. Just ensure the base is sturdy enough to hold the mousse—it should be 1-inch thick minimum.
How do I fix runny mousse?
Runny mousse happens when it hasn't chilled long enough. Return it to the fridge for 1-2 extra hours or place it in the freezer for 30 minutes—this firms it up. For immediate fixes, mix in 1 tbsp powdered sugar—it stabilizes the texture. Always chill the mousse for at least 2 hours before assembling.
Can I bake this cake in advance?
Yes! Bake the apple crisp layer 1 day ahead and store it at room temperature in an airtight container. Make the mousse 24 hours before serving—it tastes even better after resting. Assemble the cake 4 hours before serving—this gives the mousse time to set perfectly. Refrigerate until ready to slice.