
Desserts
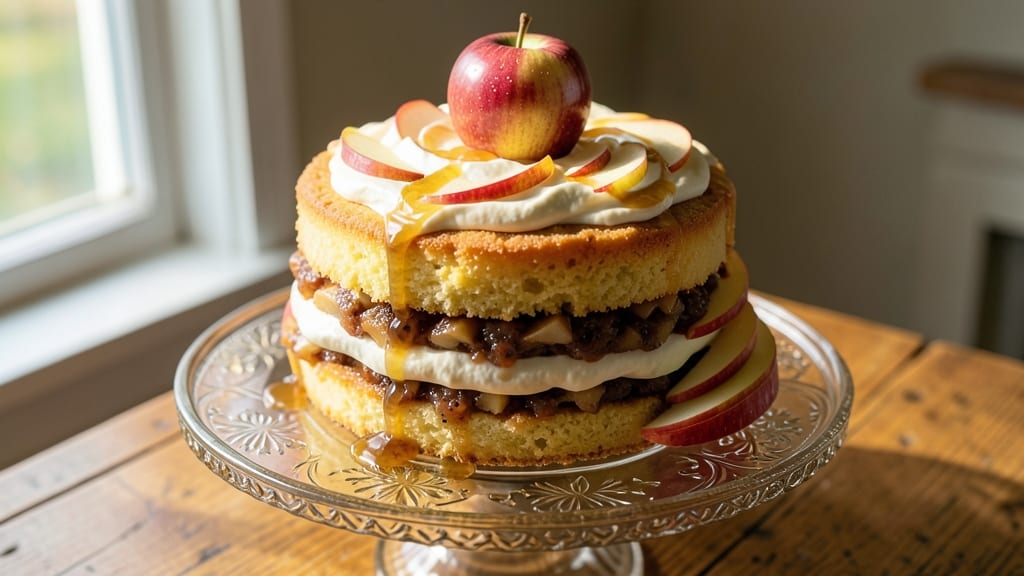
This apple and yellow cake mix recipe transforms ordinary boxed cake into a moist, spiced masterpiece with layers of vanilla and tender apples. 🍏 The secret? Mixing cake batter with sautéed apples and a warm cinnamon-vanilla glaze that keeps it from drying out—perfect for fall gatherings or cozy weeknight treats.
No fancy techniques required, just simple steps that deliver restaurant-quality results.
What makes this recipe special is how the apples soften just enough to blend into the cake while adding natural sweetness and texture. A quick sauté with cinnamon and nutmeg enhances their flavor without overpowering the vanilla base.
The cake stays tender thanks to a simple glaze that seals in moisture and adds a glossy finish.
By the time it comes out of the oven, you’ll have a golden, fragrant cake with subtle apple flecks throughout—no messy layers or complicated assembly. The aroma alone will have everyone asking for seconds, and the texture is light yet substantial, with a hint of spice in every bite.
Serve warm with whipped cream or a drizzle of caramel for extra indulgence, or enjoy it at room temperature for a satisfying afternoon snack. The best part? This recipe uses a standard yellow cake mix, so you can focus on the apples and glaze without stressing over measurements.
Ingredients for apple and yellow cake mix
Transform ordinary cake mix into a moist, spiced masterpiece with these simple ingredients.
| Ingredient | Amount | Notes |
|---|---|---|
| Yellow Cake Mix 🍞 | 1 box | Standard 15.25 oz box |
| Apples 🍏 | 2 medium | Peeled, cored, diced |
| Unsalted Butter 🧈 | ½ cup | Melted, full-fat preferred |
| Large Eggs 🥚 | 2 whole | Room temperature preferred |
| Granulated Sugar 🍚 | ½ cup | For glaze, adjust to taste |
| Milk 🥛 | ¾ cup | Any variety, room temperature |
| Vanilla Extract 🍯 | 1 tbsp | Pure extract preferred |
| Ground Cinnamon 🌶️ | 1 ½ tsp | For sautéing apples |
| Ground Nutmeg 🌿 | ¼ tsp | Freshly grated preferred |
| Salt 🧂 | ½ tsp | Kosher or sea salt |
| All-Purpose Flour 🌾 | ¼ cup | For glaze thickening |
| Whipped Cream 🍦 | 1 cup | For serving, optional |
The apples are the heart of this recipe—Honeycrisp or Fuji work best for their balance of sweetness and firmness. Local farmers markets often have perfect apples in fall, but grocery stores carry them year-round. Look for apples that are firm but yield slightly when pressed—those with bruises or soft spots won't hold up during sautéing. Peeled and diced into 1/4-inch pieces, they'll soften just enough to blend into the cake without turning mushy. I always buy a few extra apples for snacks while I cook—they're perfect for oatmeal or salads too.
No Honeycrisp apples? Gala or Pink Lady are great substitutes—they're sweeter and hold their shape better than Granny Smith. Running short on vanilla extract? Vanilla bean paste works beautifully, or use almond extract at half the amount for a different but still delicious flavor. The cake mix is the base, but don't skip the extra flour in the glaze—it's what makes it silky smooth. For a richer glaze, swap half the milk for heavy cream. And if you're feeling fancy, add a pinch of cardamom to the spice mix—it pairs wonderfully with apples and vanilla.
This cake keeps well for 3-4 days at room temperature, wrapped tightly in plastic. For longer storage, slice and freeze portions between parchment paper for up to 3 months. The glaze sets as it cools, so you can store it covered at room temperature. I always make a double batch—half for serving immediately, and half to freeze for later. Reheat slices in the microwave for 10-15 seconds to bring back that fresh-from-the-oven warmth. The whipped cream should be added just before serving to keep it light and fluffy.
Why You'll Love This Recipe
- Pantry Magic: I swear by this recipe when I forget to meal prep. Just dump the cake mix, fold in diced apples and a couple eggs—no fancy steps. The butter and sugar make it rich without extra effort.
- Caramelized Apple Magic: That moment when the apples soften and get a little brown around the edges? Chef’s kiss. The cake stays moist, but the apples add this warm, spiced sweetness that tastes like autumn in a box.
- Weeknight Crowd-Pleaser: Between us, this feeds six with leftovers for lunch. My kids grab slices for school, and my husband saves them for coffee. No one complains—it’s that universally good.
- Budget-Friendly Luxury: Honestly, it’s a splurge-free dessert that feels fancy. A box mix, a few apples, and butter? Costs pennies but tastes like a bakery bought it. My wallet thanks me every time.
Step-by-step instructions for layered apple and yellow cake mix dessert
Here's how to create a perfectly balanced dessert with tender cake and spiced apples.
👨🍳 Step 1: Prepare the Spiced Apple Filling
In a medium saucepan, combine the 2 medium Apples (diced), 0.5 cup Unsalted Butter, 1.5 tsp Ground Cinnamon, 0.25 tsp Ground Nutmeg, and 0.5 tsp Salt. Cook over medium heat for 8-10 minutes until the apples soften and release their juices.
Stir occasionally to prevent sticking, and watch for the apples to turn tender with a slight caramelization. The mixture should have a thick, jam-like consistency. Once cooked, remove from heat and let cool completely before using. This spiced apple mixture will add moisture and flavor to your cake layers.
👨🍳 Step 2: Make the Cake Batter
In a large mixing bowl, combine the 1 box Yellow Cake Mix, 2 whole Large Eggs, 0.75 cup Milk, and 1 tbsp Vanilla Extract. Using an electric mixer on low speed, beat for 2 minutes until the batter is smooth and all dry ingredients are incorporated.
Don't overmix—just until combined. The batter should have a thick, creamy consistency similar to pudding. If it looks too thick, add 1-2 tablespoons of milk to achieve the right texture. The cake will be moist and tender, not dense.
🥘 Step 3: Assemble the Cake Layers
Preheat your oven to 350°F. Grease and flour two 6-inch round cake pans (or use parchment paper liners). Divide the cake batter evenly between the two pans, spreading it out to create even layers.
Bake for 25-30 minutes or until a toothpick inserted into the center comes out clean. Let the cakes cool in the pans for 10 minutes before transferring to a wire rack to cool completely. While the cakes bake, spread the cooled apple filling evenly over the bottom cake layer.
🍳 Step 4: Create the Glaze and Final Assembly
In a small saucepan, combine 0.5 cup Granulated Sugar, 0.25 cup All-Purpose Flour, and 0.25 cup Milk. Cook over medium heat, stirring constantly, until the mixture thickens to a glossy consistency—about 3-5 minutes. Remove from heat and let cool slightly.
Once the cakes are completely cool, spread the glaze evenly over the top of the second cake layer. Then, carefully place the second cake layer on top of the first, creating a sandwich with the apple filling in between. For extra flair, pipe or spoon 1 cup Whipped Cream around the edges or on top.
Pro Tips For Making Apple And Yellow Cake Mix
- Preheat and Grease Early: I learned this the hard way—waiting for the oven to heat while the batter sits makes apples release moisture, turning your cake dense. Get pans in at 350°F (175°C) before mixing, then brush with melted butter and toss in a handful of sugar for extra crispness.
- Core Apples Like a Pro: Skip peeling if you’re in a hurry, but always core them properly—leave a ¼-inch-thick ring around the center to hold the cake together. Toss chunks in lemon juice while prepping; it keeps the apples from browning and adds a subtle brightness that cuts through the sweetness.
- Don’t Overmix the Batter: After folding in apples, stir just until combined—your mix is designed to be fluffy, not dense. Overworking it introduces air bubbles that collapse in the oven, leaving you with a sad, flat top. Use a spatula, not a whisk, and stop when streaks disappear.
- Bake Until the Toothpick Test Fails: That “clean toothpick” myth doesn’t apply here. Pull the cake when the center still has moist crumbs clinging—about 5-10 minutes before the recipe’s suggested time. The residual apple heat will finish cooking it while you’re cooling, but a dry cake is a ruined cake.
Make-ahead tips for this recipe
Prep Ahead Strategy
Make the spiced apple filling up to 2 days in advance and store it in an airtight container in the fridge. The flavors deepen over time, and it reheats beautifully in the microwave for 30 seconds before mixing into the cake batter.
I like to prep this first thing in the morning so it's ready when I'm ready to bake later in the day. 🍏
Cake Batter Prep
Mix the cake batter the night before and store it in an airtight container in the fridge. The next day, simply divide it into your pans and bake as directed. The batter stays fresh and retains its moisture, making for a perfectly tender cake.
For extra convenience, I sometimes even mix it in the morning and bake it in the evening—no one will guess it wasn't made fresh! 🧑🍳
Glaze Timing
Prepare the glaze up to 1 day ahead and store it in a sealed jar at room temperature. Reheat it gently in the microwave for 20-30 seconds before spreading it on the cake.
This keeps the glaze smooth and prevents it from becoming grainy. I often make the glaze first thing in the morning and use it later in the day for the final assembly. 🍬
Layer Assembly
Assemble the cake layers the morning you plan to serve it. Keep the components—cakes, apple filling, and glaze—separate in the fridge until you're ready to put everything together. This way, you can enjoy a freshly assembled dessert without the stress of last-minute baking.
The glaze will set slightly as it cools, giving it a beautiful finish. 🎂
Storage Solutions
Store the fully assembled cake in an airtight container in the fridge for up to 4 days. For longer storage, slice the cake and freeze individual portions between layers of parchment paper.
Thaw at room temperature for 1-2 hours before serving. Reheat slices in the microwave for 10-15 seconds to restore that fresh-baked warmth. 🥶
Make-Ahead Serving
If you're planning a party, bake the cake 1 day ahead and store it in the fridge. Bring it to room temperature for 1 hour before serving to let the flavors meld together.
Add the whipped cream just before serving to keep it light and fluffy. This way, you can focus on enjoying your guests instead of worrying about last-minute baking. 💛
Nutrition facts
Frequently asked questions
Can I substitute applesauce for the sautéed apples?
Yes, but the texture will be different. Use 1 cup unsweetened applesauce instead of the cooked apples, and reduce the milk in the cake batter by 2 tablespoons to maintain moisture. The flavor will be milder since sautéing caramelizes the apples and intensifies their taste. For best results, add 1/2 teaspoon extra cinnamon to compensate.
What if I don’t have round cake pans?
No problem! Use a 9-inch square pan or even a bundt pan for a different shape. For a single layer, bake at 350°F for 30-35 minutes until a toothpick comes out clean. Adjust baking time based on your pan size—smaller pans bake faster. A bundt pan creates beautiful ridges and is perfect for serving individual slices.
How do I keep the cake from drying out?
The glaze is key! Spread it evenly over the top layer before assembling to seal in moisture. Also, avoid overbaking—remove the cakes from the oven when they're just set (a toothpick should have a few moist crumbs). For extra tenderness, brush the cooled layers with 2 tablespoons warm milk before adding the glaze.
Can I make this a one-layer cake?
Mix the spiced apples directly into the cake batter for a single-layer cake. Use a 9-inch round or square pan and bake for 35-40 minutes. Top with the glaze right after baking while the cake is still warm. This version is perfect for quick desserts or when you want a simpler presentation.
What’s the best way to store leftovers?
Wrap individual slices in plastic wrap and store them in an airtight container at room temperature for 2-3 days. For longer storage, freeze slices between parchment paper for up to 3 months. To reheat, microwave for 10-15 seconds to restore freshness. The glaze may soften slightly when reheated, but it’s still delicious!